基于 i.MX6ULL-Linux的智能家居项目 & Linux智能车载控制系统(Qt) -
A 前情提要
这里是基于我之前构建的linux系统和写的驱动为基础的,如果只是为了学习QT,大家当然也可以根据正点原子手册里的教程使用出厂系统来编写驱动,会更加简单,在最后面,结合多媒体,以及更多的驱动来实现相关拓展内容……
这里主要使用到的内容是:
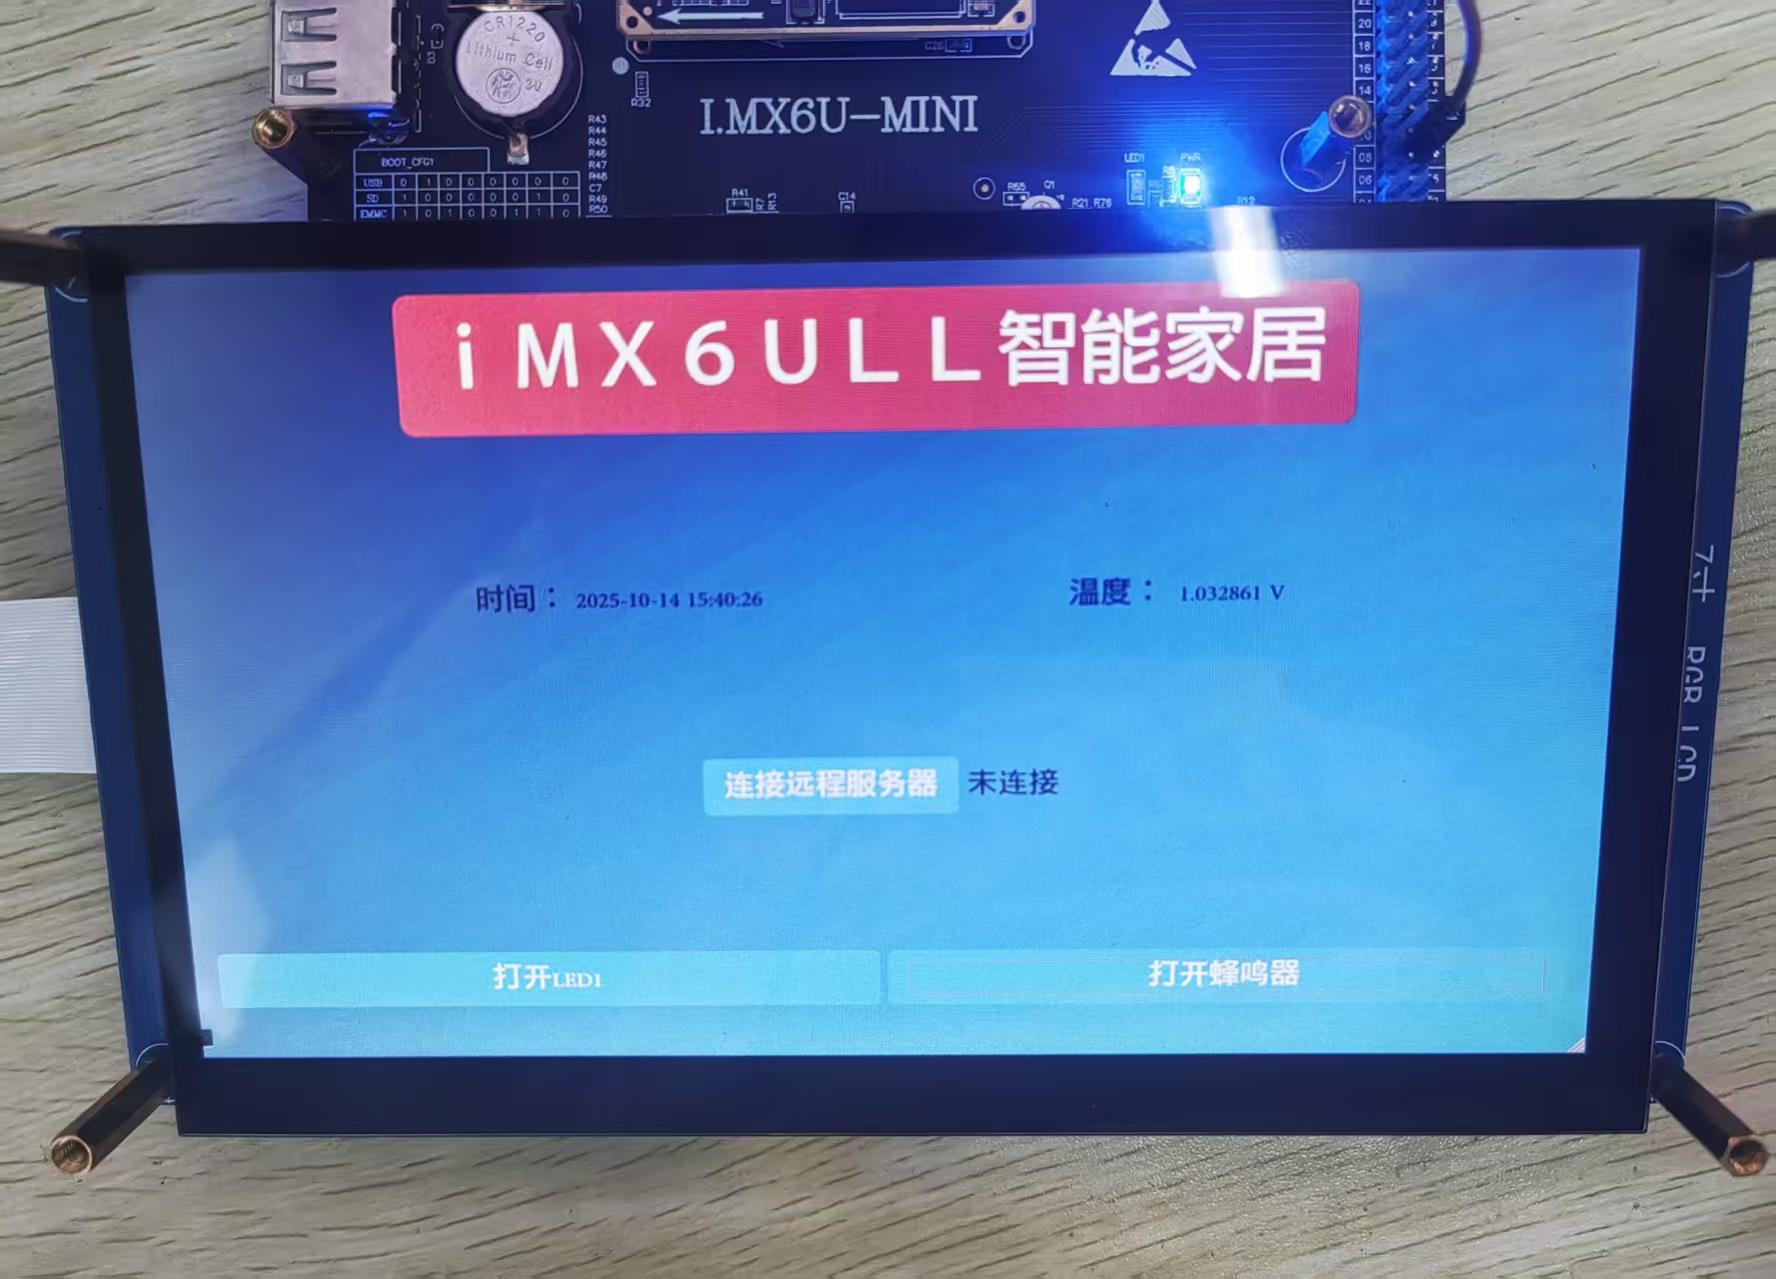
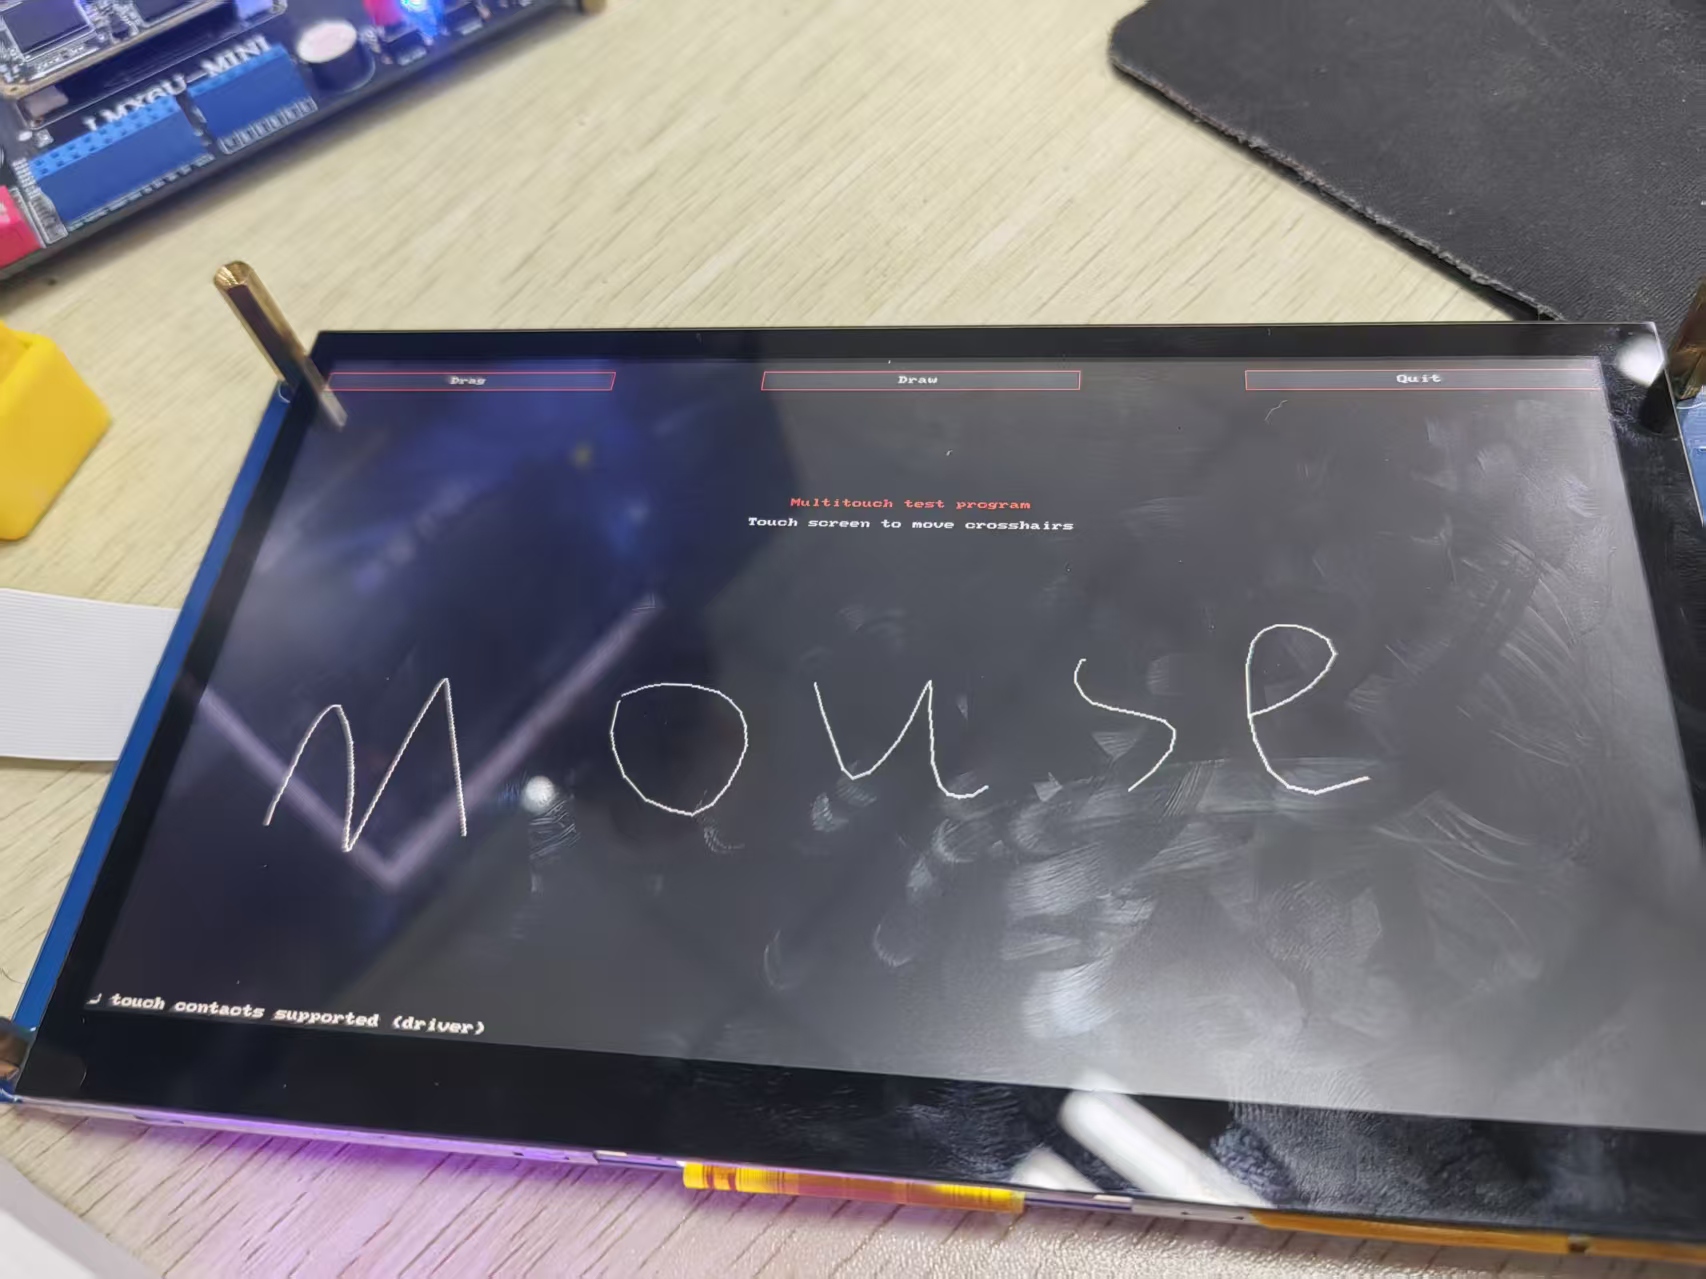
这里先贴一个最终效果图:

这里默认除了QT界面和前后端代码以外的驱动及环境已经OK了,并且有相关基础~
完整的代码会贴在最后部分……
B QT相关
B.1 图形化配置基本控件
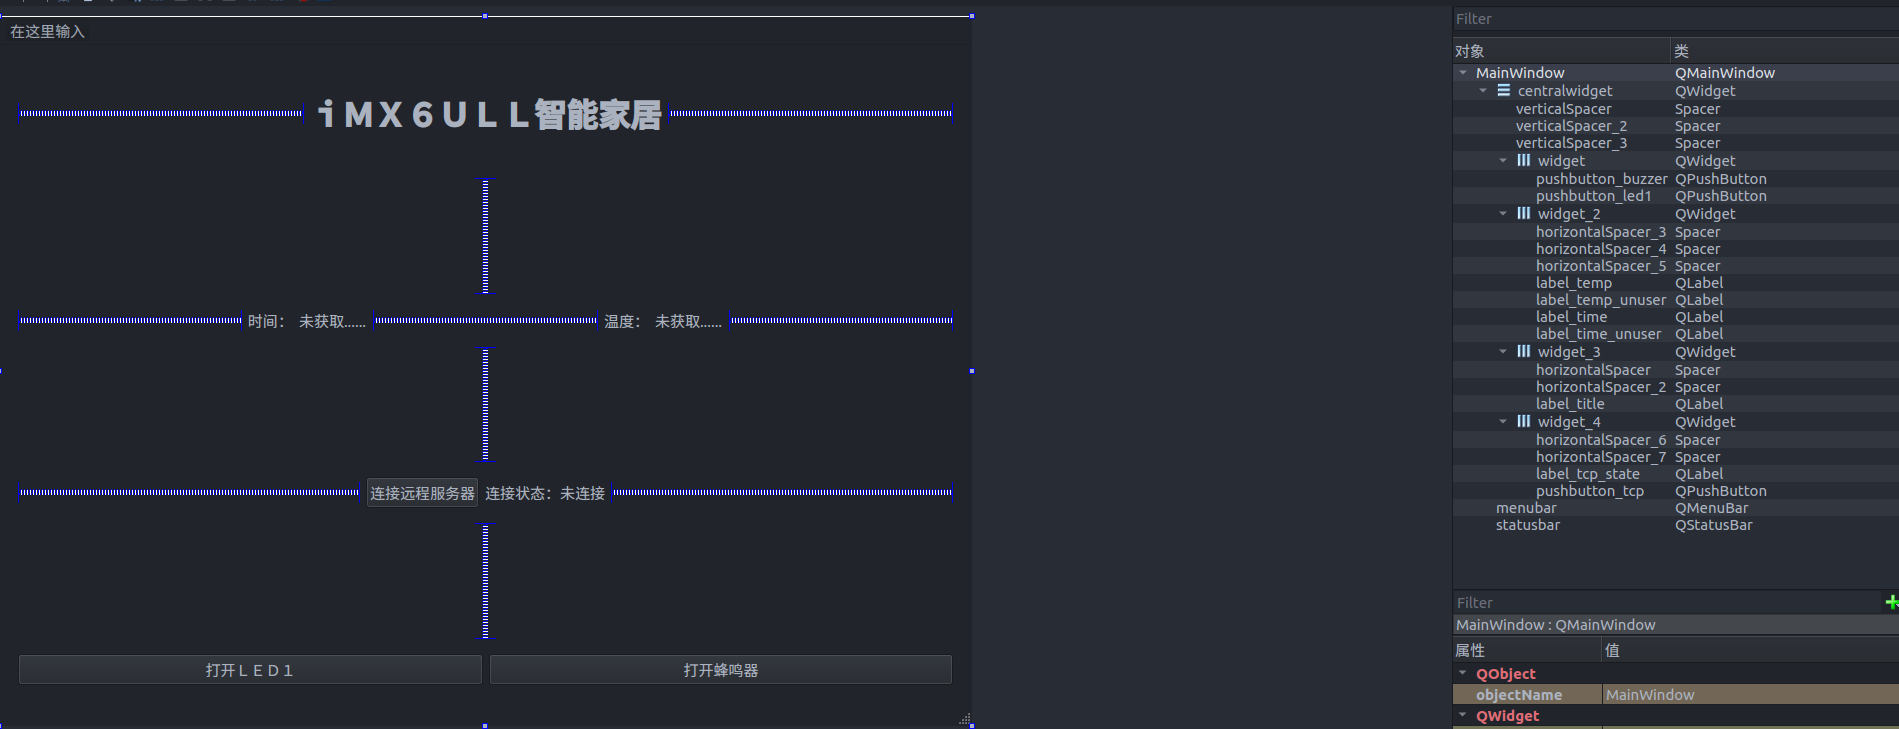
这里的布局相对简单,所以直接使用QT的图形化ui进行布局:
大致的样子如下: 有三个button,其它都是label标签,然后分别对每个标签进行命名,方便后面进行操作
B.2 控件逻辑相关
在这个界面,主要是要实现这三个按钮和一个更新温度的逻辑: 开关LED 开关蜂鸣器 连接/断开网络 更新温度
这里先在头文件的添加4个槽函数和相关flag变量:
1
2
3
4
5
6
7
8
9
10
11
12
13
|
public:
MainWindow(QWidget *parent = nullptr);
~MainWindow();
bool led1_flag;
bool buzzer_flag;
bool tcp_flag;
private slots:
bool Set_LED1(bool flag);
bool Set_Buzzer(bool flag);
bool Temperature_Update(void);
bool Set_Tcp_Server(bool flag);
|
这四个函数就可以完成整体的逻辑,这里使用 Lambda 表达式来实现槽函数,下面给出一个控制LED的例子
1
2
3
4
5
6
7
8
9
10
11
12
13
14
15
16
| MainWindow::led1_flag = false;
connect(ui->pushbutton_led1, &QPushButton::clicked, this, [this]()
{
bool newState = !MainWindow::led1_flag;
if (Set_LED1(newState))
{
MainWindow::led1_flag = newState;
ui->pushbutton_led1->setText(newState ? "关闭LED1" : "打开LED1");
} else
{
QMessageBox::critical(this, QStringLiteral("错误"), QStringLiteral("设置 LED1 失败"));
}
});
|
同理蜂鸣器和TCP的连接和断开也可以这么实现
然后是 更新温度 相关,因为温度并不是按键获取,而是ADC内部获取,所以这里选择使用定时器,3s自动获取一次ADC值然后更新出来(因为这是一个模拟项目,所以我们只获取转化为电压,而不是转化为温度)
1
2
3
4
5
6
7
8
9
10
11
12
13
14
15
16
17
18
19
20
21
22
|
timer = new QTimer(this);
timer->start(3000);
connect(timer,&QTimer::timeout,this,[=](){
if ( !Temperature_Update() )
{
ui->label_temp->setText("获取失败");
}
else
{
if(MainWindow::tcp_flag == true)
{
QString tempData = ui->label_temp->text();
QByteArray out = tempData.toUtf8();
tcpSocket->write(out);
tcpSocket->flush();
}
}
});
|
最后将一个槽函数空实现(return true),运行调试就可以得到一个基础的界面
B.3 读写imx6u外设相关
这里来实现控制LED,蜂鸣器等,Linux一切皆文件,所以控制这些外设也是通过读写文件来完成,这里不涉及LED等的驱动编写,主要介绍如何读写
首先还是以LED为例子,下面是部分LED驱动的部分代码(使用的字符设备驱动,如果是出厂系统使用的是led子系统,读写路径不同):
1
2
3
4
5
6
7
8
9
10
11
12
13
14
15
16
17
18
19
20
21
22
23
24
25
26
27
28
29
30
31
32
33
34
35
36
37
38
39
40
41
42
43
44
45
46
47
48
49
50
51
|
static ssize_t gpioled_write(struct file *filp,const char __user *buf,size_t count,loff_t *ppos)
{
struct gpio_dev *dev = (struct gpio_dev *)filp->private_data;
int retvalue;
unsigned char databuf[1];
retvalue = copy_from_user(databuf,buf,count);
if(retvalue < 0)
{
printk("kernel write failed!\r\n");
return -EFAULT;
}
led_switch(databuf[0]);
return 0;
}
gpioled.class = class_create(THIS_MODULE,GPIOLED_NAME);
if(IS_ERR(gpioled.class))
{
ret = PTR_ERR(gpioled.class);
goto fail_class;
}
gpioled.device = device_create(gpioled.class,NULL,gpioled.devid,NULL,GPIOLED_NAME);
if(IS_ERR(gpioled.device))
{
ret = PTR_ERR(gpioled.device);
goto fail_device;
}
void led_switch(u8 sta)
{
u32 val = 0;
if(sta == LED_ON)
{
gpio_set_value(gpioled.led_gpio,0);
}
else if(sta == LED_OFF)
{
gpio_set_value(gpioled.led_gpio,1);
}
}
|
通过驱动提供的接口,我们就可以在linux下对 /dev/GPIOLED_NAME 文件写入一个 LED_ON ,那么灯就会打开,反之输入 LED_OFF 就会关闭
注意GPIOLED_NAME等都是宏,需要你自己在代码中定义设置
所以在QT下我们使用QFile来读写文件,其实是非常简单的,举个栗子:
1
2
3
4
5
6
7
8
9
10
11
12
13
14
15
16
17
18
19
20
21
22
| bool MainWindow::Set_LED1(bool flag)
{
bool ret = true;
QFile file("/dev/user_gpio_led");
if (!file.open(QIODevice::WriteOnly | QIODevice::Text)) {
qDebug() << "无法打开LED设备文件";
return false;
}
QTextStream out(&file);
if (flag) {
out << "1";
} else {
out << "0";
}
file.close();
return ret;
}
|
同理蜂鸣器也是这样写的,就不列出来了,最后是ADC模块,首先这里使用的ADC的驱动是linux内核自带的,IIO子系统相关,我只是配置了设备树,然后加载相关驱动就可以使用
在 /sys/bus/iio/devices 里面会有一个设备 iio:device0,进入该目录,会看到很多文件,比如in_voltage0_raw in_voltage1_raw in_voltage_scale等,其中in_voltage1_raw 是ADC1 通道 1 原始值文件,in_voltage_scale是ADC1 比例文件(分辨率),单位为 mV。实际电压值(mV)=in_voltage1_raw,通过用cat读取这两个文件的值,然后相乘,就可以得到ADC读取到的电压值,同理在QT里面也是如此读
但这里涉及到了一个小问题,就是读取该文件之后,其实当前的路径只是一个链接,如果直接使用,可能会失效,所以这里可以使用pwd来查看一下实际的路径,比如我这里的路径就是:/sys/devices/platform/soc/2100000.aips-bus/2198000.adc/iio:device0
1
2
3
4
5
6
7
8
9
10
11
12
13
14
15
16
17
18
19
20
21
22
23
24
25
26
27
28
29
30
31
32
33
34
35
36
37
38
39
40
41
42
43
44
45
46
47
| bool MainWindow::Temperature_Update(void)
{
bool ret = true;
QString basePath = "/sys/devices/platform/soc/2100000.aips-bus/2198000.adc/iio:device0";
QFile rawFile(basePath + "/in_voltage1_raw");
QFile scaleFile(basePath + "/in_voltage_scale");
if (!rawFile.open(QIODevice::ReadOnly | QIODevice::Text)) {
qDebug() << "无法打开原始电压文件:" << rawFile.errorString();
return false;
}
QString rawStr = QTextStream(&rawFile).readLine().trimmed();
rawFile.close();
if (!scaleFile.open(QIODevice::ReadOnly | QIODevice::Text)) {
qDebug() << "无法打开电压缩放文件:" << scaleFile.errorString();
return false;
}
QString scaleStr = QTextStream(&scaleFile).readLine().trimmed();
scaleFile.close();
bool ok1, ok2;
double rawValue = rawStr.toDouble(&ok1);
double scaleValue = scaleStr.toDouble(&ok2);
if (!ok1 || !ok2) {
qDebug() << "数据转换错误: raw=" << rawStr << "scale=" << scaleStr;
return false;
}
double voltage_mV = rawValue * scaleValue;
double voltage_V = voltage_mV / 1000.0;
qDebug() << "Debug Info - Raw:" << rawValue << "Scale:" << scaleValue << "Voltage:" << voltage_mV << "mV";
QString temperatureText = QString(" %1 V").arg(voltage_V, 0, 'f', 6);
ui->label_temp->setText(temperatureText);
return ret;
}
|
读取文件后简单计算就可以获得对应的电压值了,通过以上内容,基本可以实现在触摸屏上来控制LED和蜂鸣器,以及显示温度,这里就可以进行第二步调试,如果有问题需要检查led等驱动和qt的读写文件是不是有问题,下面就是物联网现相关的代码了……
B.4 物联网相关
在实现上面的基础控制之后,就可以来添加物联网功能了,首先这里假设服务器已经搭建完毕,我们只用负责去连接,这里选择TCP连接,也是使用QT的QTcpSocket等互联网相关库,注意在pro文件中添加QT += core gui network
这里还是主要实现几个函数: 连接/断开服务器和获取本地IP,以及处理TCP接收到的指令
首先先看一下如何获取本地IP,这个ip地址要在后面连接的时候使用
1
2
3
4
5
6
7
8
9
10
11
12
13
14
15
16
17
18
19
20
21
22
23
24
25
26
27
28
29
30
31
| QString MainWindow::getLocalHostIP(void)
{
QList<QHostAddress> ipAddressesList = QNetworkInterface::allAddresses();
QString localIP;
for (int i = 0; i < ipAddressesList.size(); ++i)
{
QHostAddress ipAddr = ipAddressesList.at(i);
if (ipAddr.protocol() == QAbstractSocket::IPv4Protocol &&
ipAddr != QHostAddress::Null &&
ipAddr != QHostAddress::LocalHost &&
!ipAddr.toString().startsWith("127.0.") &&
!ipAddr.toString().startsWith("169."))
{
localIP = ipAddr.toString();
break;
}
}
if (localIP.isEmpty())
{
localIP = "127.0.0.1";
qDebug() << "Warning: Using loopback address, no valid IPv4 address found";
}
qDebug() << "Local IP Address:" << localIP;
return localIP;
}
|
然后就是连接远程服务器:
1
2
3
4
5
6
7
8
9
10
11
12
13
14
15
16
17
18
19
20
21
22
23
24
25
26
27
28
29
30
31
32
33
34
35
36
37
38
39
40
41
42
43
44
45
46
47
48
49
50
51
52
53
54
55
56
57
58
59
60
61
62
63
64
65
66
67
68
69
70
71
72
73
74
| bool MainWindow::Set_Tcp_Server(bool flag)
{
bool ret = false;
if(flag)
{
if(tcpSocket->state() == QAbstractSocket::ConnectedState) {
ui->label_tcp_state->setText("已连接");
qDebug() << "TCP: Already connected";
return true;
}
if(tcpSocket->state() == QAbstractSocket::ConnectingState) {
ui->label_tcp_state->setText("正在连接中,请稍候...");
qDebug() << "TCP: Connection in progress";
return false;
}
QString localIP = getLocalHostIP();
qDebug() << "Local IP:" << localIP;
QString serverIP = "xxx.xxx.xxx.xxx";
quint16 serverPort = "xxx";
connect(tcpSocket, &QTcpSocket::connected, this, [this]() {
qDebug() << "TCP: Connected to server";
ui->label_tcp_state->setText("已连接");
ui->pushbutton_tcp->setText("断开远程服务器");
});
connect(tcpSocket, &QTcpSocket::disconnected, this, [this]() {
qDebug() << "TCP: Disconnected from server";
ui->label_tcp_state->setText("未连接");
ui->pushbutton_tcp->setText("连接远程服务器");
MainWindow::tcp_flag = false;
});
ui->label_tcp_state->setText("正在连接...");
tcpSocket->connectToHost(serverIP, serverPort);
if(tcpSocket->waitForConnected(5000)) {
ret = true;
qDebug() << "TCP: Connection established successfully";
} else {
qDebug() << "TCP: Connection failed -" << tcpSocket->errorString();
ui->label_tcp_state->setText("连接失败: " + tcpSocket->errorString());
ret = false;
}
} else {
if(tcpSocket->state() == QAbstractSocket::ConnectedState) {
tcpSocket->disconnectFromHost();
if(tcpSocket->state() == QAbstractSocket::UnconnectedState ||
tcpSocket->waitForDisconnected(3000)) {
ret = true;
ui->label_tcp_state->setText("未连接");
qDebug() << "TCP: Disconnected successfully";
}
} else {
ret = true;
ui->label_tcp_state->setText("未连接");
}
}
return ret;
}
|
这里主要断开连接的时候不要使用tcpSocket->disconnect()来断开所有连接,这样会导致接收TCP数据的槽函数被断开,如果imx6u断开重连后就无法接收数据,这里的接收函数如下,数据包是自己定义的
1
2
3
4
5
6
7
8
9
10
11
12
13
14
15
16
17
18
19
20
21
22
23
24
25
26
27
28
29
30
31
32
33
34
35
36
37
38
39
40
41
42
43
44
45
46
47
48
49
50
51
52
53
54
55
56
57
58
59
60
61
62
63
64
65
66
67
68
69
70
71
72
73
74
75
76
77
78
79
80
81
82
83
84
85
86
87
88
89
90
91
92
93
94
95
96
97
|
connect(tcpSocket, &QTcpSocket::readyRead, this, [this]() {
QByteArray newData = tcpSocket->readAll();
if (!newData.isEmpty()) {
tcpBuf.append(newData);
}
while (tcpBuf.size() >= 3) {
if (static_cast<unsigned char>(tcpBuf[2]) != 0xFF) {
tcpBuf.remove(0, 1);
continue;
}
unsigned char b0 = static_cast<unsigned char>(tcpBuf[0]);
unsigned char b1 = static_cast<unsigned char>(tcpBuf[1]);
tcpBuf.remove(0, 3);
if (b0 == 0x01) {
if (b1 == 0x01) {
if (Set_LED1(true)) {
MainWindow::led1_flag = true;
ui->pushbutton_led1->setText(QStringLiteral("关闭LED1"));
qDebug() << "LED1 turned on via 3-byte packet";
} else {
qDebug() << "Failed to turn on LED1 via TCP packet";
}
} else if (b1 == 0x02) {
if (Set_LED1(false)) {
MainWindow::led1_flag = false;
ui->pushbutton_led1->setText(QStringLiteral("打开LED1"));
qDebug() << "LED1 turned off via 3-byte packet";
} else {
qDebug() << "Failed to turn off LED1 via TCP packet";
}
} else {
qDebug() << "Unknown LED command b1=" << b1;
}
}
else if (b0 == 0x02) {
if (b1 == 0x01) {
if (Set_Buzzer(true)) {
MainWindow::buzzer_flag = true;
ui->pushbutton_buzzer->setText(QStringLiteral("关闭蜂鸣器"));
qDebug() << "Buzzer turned on via 3-byte packet";
} else {
qDebug() << "Failed to turn on buzzer via TCP packet";
}
} else if (b1 == 0x02) {
if (Set_Buzzer(false)) {
MainWindow::buzzer_flag = false;
ui->pushbutton_buzzer->setText(QStringLiteral("打开蜂鸣器"));
qDebug() << "Buzzer turned off via 3-byte packet";
} else {
qDebug() << "Failed to turn off buzzer via TCP packet";
}
} else {
qDebug() << "Unknown BEEP command b1=" << b1;
}
}
else if (b0 == 0x03 && b1 == 0x01) {
if (Temperature_Update()) {
qDebug() << "Temperature updated via TCP request";
QString tempData = ui->label_temp->text();
QByteArray out = tempData.toUtf8();
tcpSocket->write(out);
tcpSocket->flush();
} else {
ui->label_temp->setText(QStringLiteral("获取失败"));
QByteArray out = QStringLiteral("获取失败").toUtf8();
tcpSocket->write(out);
tcpSocket->flush();
}
}
else {
qDebug() << "Unknown 3-byte packet: b0=" << b0 << " b1=" << b1;
}
}
});
|
通过解析得到的数据包然后调用相关函数就可以实现接收服务器数据,并控制相关外设或者发送数据给服务器,这样就实现了一个简易的物联网通信,当然实际项目中,大家可以使用MQTT物联网会更加方便安全
通过上面这些函数,QT的逻辑方面基本都结束了,下面的B5 B6主要是一些额外添加自选的部分
B.5 添加显示时间
添加显示时间很简单,只用调用QT的QDateTime库即可,举个例子:
1
2
3
4
5
6
7
8
9
10
11
12
13
14
15
16
17
18
19
20
21
22
23
24
25
26
27
| connect(timer,&QTimer::timeout,this,[=](){
time_cnt++;
if(time_cnt>=3)
{
time_cnt = 0;
if ( !Temperature_Update() )
{
ui->label_temp->setText("获取失败");
}
else
{
if(MainWindow::tcp_flag == true)
{
QString tempData = ui->label_temp->text();
QByteArray out = tempData.toUtf8();
tcpSocket->write(out);
tcpSocket->flush();
}
}
}
QDateTime currentDateTime = QDateTime::currentDateTime();
QString timeString = currentDateTime.toString("yyyy-MM-dd HH:mm:ss");
ui->label_time->setText(timeString);
});
timer->start(1000);
|
通过更改定时器为1s,每过1s通过 QDateTime::currentDateTime()获取当前时间,并转化为想要的格式显示到屏幕上即可
B.6 界面简单美化
这里主要使用样式表设置了一下按钮背景,字体大小,还有整体背景颜色,大家可以根据自己的喜欢来设置
举个例子:
1
2
3
4
5
6
7
8
9
10
11
12
13
14
15
16
17
18
19
20
21
22
23
24
25
26
27
28
| this->setStyleSheet(
"QMainWindow {"
" background: qlineargradient(x1:0, y1:0, x2:1, y2:1, stop:0 #2c3e50, stop:1 #3498db);"
"}"
"QPushButton {"
" background-color: #3498db;"
" border: none;"
" border-radius: 5px;"
" color: white;"
" padding: 8px 15px;"
"}"
"QPushButton:hover {"
" background-color: #2980b9;"
"}"
"QPushButton:pressed {"
" background-color: #21618c;"
"}"
);
ui->label_title->setStyleSheet(
"QLabel {"
" background: qlineargradient(x1:0, y1:0, x2:1, y2:0, stop:0 #e74c3c, stop:1 #c0392b);"
" color: white;"
" border-radius: 10px;"
" padding: 10px;"
" font-weight: bold;"
"}"
);
|
C 网页相关
因为这里主要是嵌入式相关,前后端涉及的不多,所以这里使用的都是非常简单的代码,如果有前后端基础的可以自己编写更好用且更美观的界面~
C.1 前端
前端使用静态页面(HTML/CSS/原始javaScript),通过浏览器的WebSocket与后端通信,通过sessionStorage做一个示例登录(不安全)
- WebSocket 是全双工、事件驱动的协议;浏览器与后端可以任意一端主动推送数据
C.2 后端
后端使用 Python 3 + asyncio,使用第三方库 websockets 提供 WebSocket 服务,同时用 asyncio(异步) 的 TCP server 接收 imx6ull的数据并转发给网页客户端,或网页转发给imx6ull命令
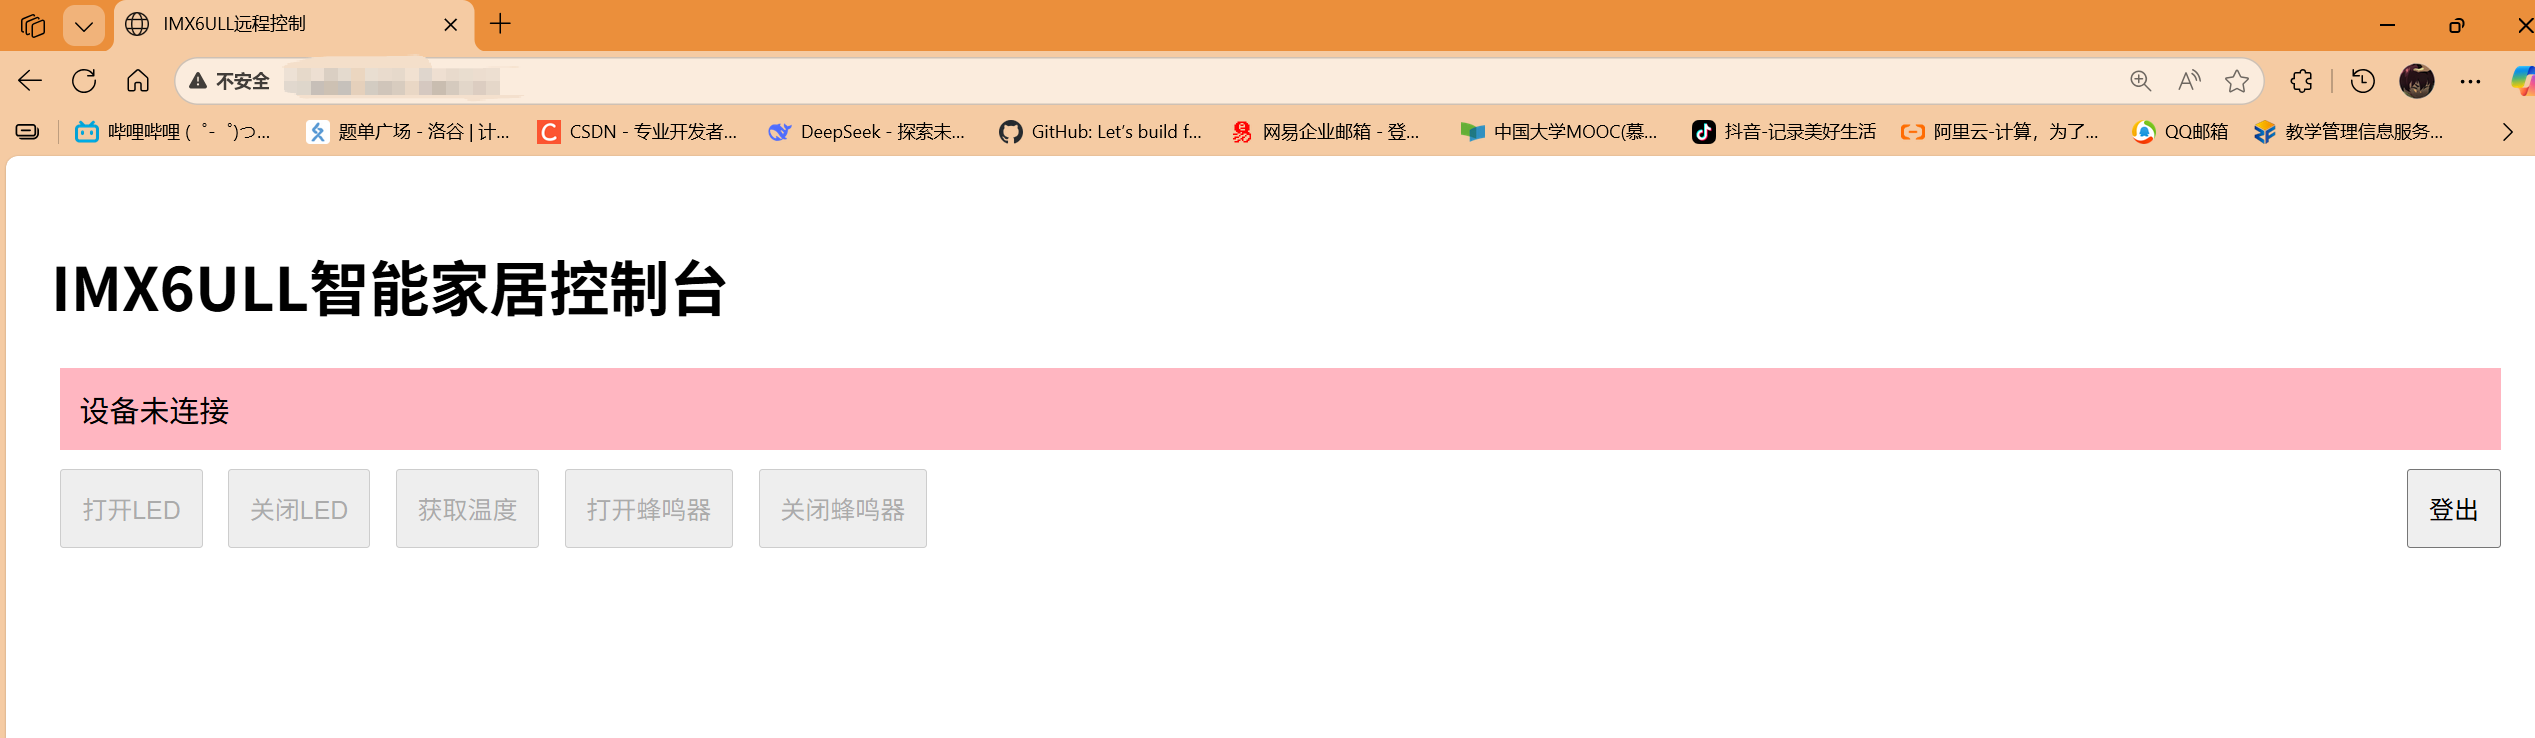
这两个部分只是物联网示例,代码逻辑都非常简单,大家也可以直接用AI跑出来,具体代码贴也是贴在最后面,下面是前端的页面:
D imx6u驱动相关
这里主要给出链接,大家可以自己查看或者查找,有问题可以留言
E 相关问题
- 在imx6ull连接再断开,再连接之后,无法响应服务器发送的消息
检查Set_Tcp_Server()函数中,不要调用tcpSocket->disconnect(),这样会导致槽函数也关闭
检查Set_LED1()等函数,检查写文件写入的字符是什么类型,需要与驱动里面的类型对上,比如可以同时规定成字符’1’
检查QT读取ADC的打开文件函数的路径,路径尽量写成绝对地址,不要使用链接,否则可能会有问题
检查rtc的时间,因为没有写网络更新函数,所以时间需要更新一次
hwclock -r 查看当前时间,如果不对可以使用date -s "2025-10-14 15:30:00"写入当前时间,然后hwclock -w进行保存
F 完整代码
如果有整体文件需求,可以留言或者发邮箱给我
下面是具体代码:
mainwindow.h: 点击查看更多
1
2
3
4
5
6
7
8
9
10
11
12
13
14
15
16
17
18
19
20
21
22
23
24
25
26
27
28
29
30
31
32
33
34
35
36
37
38
39
40
41
42
43
44
45
46
47
48
49
50
51
52
| #ifndef MAINWINDOW_H
#define MAINWINDOW_H
#include <QMainWindow>
#include <QPushButton>
#include <QTimerEvent>
#include <QFile>
#include <QFont>
#include <QTimer>
#include <QNetworkInterface>
#include <QDebug>
#include <QTcpServer>
#include <QTcpSocket>
#include <QString>
#include <QAbstractAnimation>
#include <QErrorMessage>
QT_BEGIN_NAMESPACE
namespace Ui { class MainWindow; }
QT_END_NAMESPACE
class MainWindow : public QMainWindow
{
Q_OBJECT
public:
MainWindow(QWidget *parent = nullptr);
~MainWindow();
QTimer *timer;
bool led1_flag;
bool buzzer_flag;
bool tcp_flag;
QTcpSocket *tcpSocket;
QByteArray tcpBuf;
QString getLocalHostIP();
int time_cnt;
private:
Ui::MainWindow *ui;
private slots:
bool Set_LED1(bool flag);
bool Set_Buzzer(bool flag);
bool Temperature_Update(void);
bool Set_Tcp_Server(bool flag);
};
#endif
|
mainwindow.c: 点击查看更多
注意修改成自己的tcp和websocket端口号,以及修改服务器地址
1
2
3
4
5
6
7
8
9
10
11
12
13
14
15
16
17
18
19
20
21
22
23
24
25
26
27
28
29
30
31
32
33
34
35
36
37
38
39
40
41
42
43
44
45
46
47
48
49
50
51
52
53
54
55
56
57
58
59
60
61
62
63
64
65
66
67
68
69
70
71
72
73
74
75
76
77
78
79
80
81
82
83
84
85
86
87
88
89
90
91
92
93
94
95
96
97
98
99
100
101
102
103
104
105
106
107
108
109
110
111
112
113
114
115
116
117
118
119
120
121
122
123
124
125
126
127
128
129
130
131
132
133
134
135
136
137
138
139
140
141
142
143
144
145
146
147
148
149
150
151
152
153
154
155
156
157
158
159
160
161
162
163
164
165
166
167
168
169
170
171
172
173
174
175
176
177
178
179
180
181
182
183
184
185
186
187
188
189
190
191
192
193
194
195
196
197
198
199
200
201
202
203
204
205
206
207
208
209
210
211
212
213
214
215
216
217
218
219
220
221
222
223
224
225
226
227
228
229
230
231
232
233
234
235
236
237
238
239
240
241
242
243
244
245
246
247
248
249
250
251
252
253
254
255
256
257
258
259
260
261
262
263
264
265
266
267
268
269
270
271
272
273
274
275
276
277
278
279
280
281
282
283
284
285
286
287
288
289
290
291
292
293
294
295
296
297
298
299
300
301
302
303
304
305
306
307
308
309
310
311
312
313
314
315
316
317
318
319
320
321
322
323
324
325
326
327
328
329
330
331
332
333
334
335
336
337
338
339
340
341
342
343
344
345
346
347
348
349
350
351
352
353
354
355
356
357
358
359
360
361
362
363
364
365
366
367
368
369
370
371
372
373
374
375
376
377
378
379
380
381
382
383
384
385
386
387
388
389
390
391
392
393
394
395
396
397
398
399
400
401
402
403
404
405
406
407
408
409
410
411
412
413
414
415
416
417
418
419
420
421
422
423
424
425
426
427
428
429
430
431
432
433
434
435
436
437
438
439
440
441
442
443
444
| #include "mainwindow.h"
#include "ui_mainwindow.h"
#include <QMessageBox>
#include <QDateTime>
#include <QTimer>
MainWindow::MainWindow(QWidget *parent)
: QMainWindow(parent)
, ui(new Ui::MainWindow)
{
ui->setupUi(this);
QFont qfont;
qfont.setPointSize(40);
ui->label_title->setFont(qfont);
qfont.setPointSize(16);
ui->label_temp->setFont(qfont);
ui->label_tcp_state->setFont(qfont);
ui->label_temp_unuser->setFont(qfont);
ui->pushbutton_tcp->setFont(qfont);
ui->pushbutton_led1->setFont(qfont);
ui->pushbutton_buzzer->setFont(qfont);
ui->label_time->setFont(qfont);
ui->label_time_unuser->setFont(qfont);
time_cnt = 0;
timer = new QTimer(this);
tcpSocket = new QTcpSocket();
MainWindow::tcp_flag = false;
MainWindow::led1_flag = false;
MainWindow::buzzer_flag = false;
this->setStyleSheet(
    "QMainWindow {"
    "   background: qlineargradient(x1:0, y1:0, x2:1, y2:1, stop:0 #2c3e50, stop:1 #3498db);"
    "}"
    "QPushButton {"
    "   background-color: #3498db;"
    "   border: none;"
    "   border-radius: 5px;"
    "   color: white;"
    "   padding: 8px 15px;"
    "}"
    "QPushButton:hover {"
    "   background-color: #2980b9;"
    "}"
    "QPushButton:pressed {"
    "   background-color: #21618c;"
    "}"
);

ui->label_title->setStyleSheet(
    "QLabel {"
    "   background: qlineargradient(x1:0, y1:0, x2:1, y2:0, stop:0 #e74c3c, stop:1 #c0392b);"
    "   color: white;"
    "   border-radius: 10px;"
    "   padding: 10px;"
    "   font-weight: bold;"
    "}"
);
connect(ui->pushbutton_led1, &QPushButton::clicked, this, [this]() {
bool newState = !MainWindow::led1_flag;
if (Set_LED1(newState)) {
MainWindow::led1_flag = newState;
ui->pushbutton_led1->setText(newState ? "关闭LED1" : "打开LED1");
} else {
QMessageBox::critical(this, QStringLiteral("错误"), QStringLiteral("设置 LED1 失败"));
}
});
connect(ui->pushbutton_buzzer, &QPushButton::clicked, this, [this]() {
bool newState = !MainWindow::buzzer_flag;
if (Set_Buzzer(newState)) {
MainWindow::buzzer_flag = newState;
ui->pushbutton_buzzer->setText(newState ? "关闭蜂鸣器" : "打开蜂鸣器");
} else {
QMessageBox::critical(this, QStringLiteral("错误"), QStringLiteral("设置蜂鸣器失败"));
}
});
connect(ui->pushbutton_tcp, &QPushButton::clicked, this, [this]() {
bool newState = !MainWindow::tcp_flag;
if (Set_Tcp_Server(newState)) {
MainWindow::tcp_flag = newState;
ui->pushbutton_tcp->setText(newState ? "断开远程服务器" : "连接远程服务器");
} else {
QMessageBox::critical(this, QStringLiteral("错误"), QStringLiteral("连接/断开远程服务器失败"));
ui->pushbutton_tcp->setText(MainWindow::tcp_flag ? "断开远程服务器" : "连接远程服务器");
}
});
connect(timer,&QTimer::timeout,this,[=](){
time_cnt++;
if(time_cnt>=3)
{
time_cnt = 0;
if ( !Temperature_Update() )
{
ui->label_temp->setText("获取失败");
}
else
{
if(MainWindow::tcp_flag == true)
{
QString tempData = ui->label_temp->text();
QByteArray out = tempData.toUtf8();
tcpSocket->write(out);
tcpSocket->flush();
}
}
}
QDateTime currentDateTime = QDateTime::currentDateTime();
QString timeString = currentDateTime.toString("yyyy-MM-dd HH:mm:ss");
ui->label_time->setText(timeString);
});
timer->start(1000);
connect(tcpSocket, &QTcpSocket::readyRead, this, [this]() {
QByteArray newData = tcpSocket->readAll();
if (!newData.isEmpty()) {
tcpBuf.append(newData);
}
while (tcpBuf.size() >= 3) {
if (static_cast<unsigned char>(tcpBuf[2]) != 0xFF) {
tcpBuf.remove(0, 1);
continue;
}
unsigned char b0 = static_cast<unsigned char>(tcpBuf[0]);
unsigned char b1 = static_cast<unsigned char>(tcpBuf[1]);
tcpBuf.remove(0, 3);
if (b0 == 0x01) {
if (b1 == 0x01) {
if (Set_LED1(true)) {
MainWindow::led1_flag = true;
ui->pushbutton_led1->setText(QStringLiteral("关闭LED1"));
qDebug() << "LED1 turned on via 3-byte packet";
} else {
qDebug() << "Failed to turn on LED1 via TCP packet";
}
} else if (b1 == 0x02) {
if (Set_LED1(false)) {
MainWindow::led1_flag = false;
ui->pushbutton_led1->setText(QStringLiteral("打开LED1"));
qDebug() << "LED1 turned off via 3-byte packet";
} else {
qDebug() << "Failed to turn off LED1 via TCP packet";
}
} else {
qDebug() << "Unknown LED command b1=" << b1;
}
}
else if (b0 == 0x02) {
if (b1 == 0x01) {
if (Set_Buzzer(true)) {
MainWindow::buzzer_flag = true;
ui->pushbutton_buzzer->setText(QStringLiteral("关闭蜂鸣器"));
qDebug() << "Buzzer turned on via 3-byte packet";
} else {
qDebug() << "Failed to turn on buzzer via TCP packet";
}
} else if (b1 == 0x02) {
if (Set_Buzzer(false)) {
MainWindow::buzzer_flag = false;
ui->pushbutton_buzzer->setText(QStringLiteral("打开蜂鸣器"));
qDebug() << "Buzzer turned off via 3-byte packet";
} else {
qDebug() << "Failed to turn off buzzer via TCP packet";
}
} else {
qDebug() << "Unknown BEEP command b1=" << b1;
}
}
else if (b0 == 0x03 && b1 == 0x01) {
if (Temperature_Update()) {
qDebug() << "Temperature updated via TCP request";
QString tempData = ui->label_temp->text();
QByteArray out = tempData.toUtf8();
tcpSocket->write(out);
tcpSocket->flush();
} else {
ui->label_temp->setText(QStringLiteral("获取失败"));
QByteArray out = QStringLiteral("获取失败").toUtf8();
tcpSocket->write(out);
tcpSocket->flush();
}
}
else {
qDebug() << "Unknown 3-byte packet: b0=" << b0 << " b1=" << b1;
}
}
});
}
MainWindow::~MainWindow()
{
delete ui;
}
bool MainWindow::Set_LED1(bool flag)
{
bool ret = true;
QFile file("/dev/user_gpio_led");
if (!file.open(QIODevice::WriteOnly | QIODevice::Text)) {
qDebug() << "无法打开LED设备文件";
return false;
}
QTextStream out(&file);
if (flag) {
out << "1";
} else {
out << "0";
}
file.close();
return ret;
}
bool MainWindow::Set_Buzzer(bool flag)
{
bool ret = true;
QFile file("/dev/user_gpio_buzzer");
if (!file.open(QIODevice::WriteOnly | QIODevice::Text)) {
qDebug() << "无法打开蜂鸣器设备文件:" << file.errorString();
return false;
}
QTextStream out(&file);
if (flag) {
out << "1";
qDebug() << "蜂鸣器已打开";
} else {
out << "0";
qDebug() << "蜂鸣器已关闭";
}
file.close();
return ret;
}
bool MainWindow::Set_Tcp_Server(bool flag)
{
bool ret = false;
if(flag) {
if(tcpSocket->state() == QAbstractSocket::ConnectedState) {
ui->label_tcp_state->setText("已连接");
qDebug() << "TCP: Already connected";
return true;
}
if(tcpSocket->state() == QAbstractSocket::ConnectingState) {
ui->label_tcp_state->setText("正在连接中,请稍候...");
qDebug() << "TCP: Connection in progress";
return false;
}
QString localIP = getLocalHostIP();
qDebug() << "Local IP:" << localIP;
QString serverIP = "xxx.xxx.xxx.xxx";
quint16 serverPort = 555;
connect(tcpSocket, &QTcpSocket::connected, this, [this]() {
qDebug() << "TCP: Connected to server";
ui->label_tcp_state->setText("已连接");
ui->pushbutton_tcp->setText("断开远程服务器");
});
connect(tcpSocket, &QTcpSocket::disconnected, this, [this]() {
qDebug() << "TCP: Disconnected from server";
ui->label_tcp_state->setText("未连接");
ui->pushbutton_tcp->setText("连接远程服务器");
MainWindow::tcp_flag = false;
});
ui->label_tcp_state->setText("正在连接...");
tcpSocket->connectToHost(serverIP, serverPort);
if(tcpSocket->waitForConnected(5000)) {
ret = true;
qDebug() << "TCP: Connection established successfully";
} else {
qDebug() << "TCP: Connection failed -" << tcpSocket->errorString();
ui->label_tcp_state->setText("连接失败: " + tcpSocket->errorString());
ret = false;
}
} else {
if(tcpSocket->state() == QAbstractSocket::ConnectedState) {
tcpSocket->disconnectFromHost();
if(tcpSocket->state() == QAbstractSocket::UnconnectedState ||
tcpSocket->waitForDisconnected(3000)) {
ret = true;
ui->label_tcp_state->setText("未连接");
qDebug() << "TCP: Disconnected successfully";
}
} else {
ret = true;
ui->label_tcp_state->setText("未连接");
}
}
return ret;
}
bool MainWindow::Temperature_Update(void)
{
bool ret = true;
QString basePath = "/sys/devices/platform/soc/2100000.aips-bus/2198000.adc/iio:device0";
QFile rawFile(basePath + "/in_voltage1_raw");
QFile scaleFile(basePath + "/in_voltage_scale");
if (!rawFile.open(QIODevice::ReadOnly | QIODevice::Text)) {
qDebug() << "无法打开原始电压文件:" << rawFile.errorString();
return false;
}
QString rawStr = QTextStream(&rawFile).readLine().trimmed();
rawFile.close();
if (!scaleFile.open(QIODevice::ReadOnly | QIODevice::Text)) {
qDebug() << "无法打开电压缩放文件:" << scaleFile.errorString();
return false;
}
QString scaleStr = QTextStream(&scaleFile).readLine().trimmed();
scaleFile.close();
bool ok1, ok2;
double rawValue = rawStr.toDouble(&ok1);
double scaleValue = scaleStr.toDouble(&ok2);
if (!ok1 || !ok2) {
qDebug() << "数据转换错误: raw=" << rawStr << "scale=" << scaleStr;
return false;
}
double voltage_mV = rawValue * scaleValue;
double voltage_V = voltage_mV / 1000.0;
qDebug() << "Debug Info - Raw:" << rawValue << "Scale:" << scaleValue << "Voltage:" << voltage_mV << "mV";
QString temperatureText = QString(" %1 V").arg(voltage_V, 0, 'f', 6);
ui->label_temp->setText(temperatureText);
return ret;
}
QString MainWindow::getLocalHostIP(void)
{
QList<QHostAddress> ipAddressesList = QNetworkInterface::allAddresses();
QString localIP;
for (int i = 0; i < ipAddressesList.size(); ++i) {
QHostAddress ipAddr = ipAddressesList.at(i);
if (ipAddr.protocol() == QAbstractSocket::IPv4Protocol &&
ipAddr != QHostAddress::Null &&
ipAddr != QHostAddress::LocalHost &&
!ipAddr.toString().startsWith("127.0.") &&
!ipAddr.toString().startsWith("169.")) {
localIP = ipAddr.toString();
break;
}
}
if (localIP.isEmpty()) {
localIP = "127.0.0.1";
qDebug() << "Warning: Using loopback address, no valid IPv4 address found";
}
qDebug() << "Local IP Address:" << localIP;
return localIP;
}
|
qianduan.html: 点击查看更多
注意修改成自己的tcp和websocket端口号,以及修改服务器地址
1
2
3
4
5
6
7
8
9
10
11
12
13
14
15
16
17
18
19
20
21
22
23
24
25
26
27
28
29
30
31
32
33
34
35
36
37
38
39
40
41
42
43
44
45
46
47
48
49
50
51
52
53
54
55
56
57
58
59
60
61
62
63
64
65
66
67
68
69
70
71
72
73
74
75
76
77
78
79
80
81
82
83
84
85
86
87
88
89
90
91
92
93
94
95
96
97
98
99
100
101
102
103
104
105
106
107
108
109
110
111
112
113
114
115
116
117
118
119
120
121
122
123
124
125
126
127
128
129
130
131
132
133
134
135
136
137
138
139
140
141
142
143
144
145
146
147
148
149
150
151
152
153
154
155
156
157
158
159
160
161
162
163
164
165
166
167
168
169
170
171
172
173
174
175
176
177
178
179
180
181
182
183
184
185
186
187
188
189
190
191
192
193
194
195
196
197
198
199
200
201
202
203
204
205
206
207
208
209
210
211
212
213
214
215
216
217
218
219
220
221
222
223
224
225
226
227
228
229
230
231
232
233
234
235
236
237
238
239
240
241
242
243
244
| <!DOCTYPE html>
<html>
<head>
<meta charset="UTF-8">
<title>IMX6ULL远程控制</title>
<style>
body { font-family: sans-serif; }
.status { padding: 10px; margin: 5px; background-color: #f0f0f0; }
button { padding: 10px; margin: 5px; }
#loginBox { max-width: 320px; margin: 80px auto; padding: 20px; border: 1px solid #ccc; border-radius: 6px; background:#fff; }
#loginBox input { width: 100%; padding: 8px; margin: 6px 0; box-sizing: border-box; }
#mainUI { display: none; padding: 16px; }
</style>
</head>
<body>
<div id="loginBox">
<h2>登录</h2>
<label>用户名</label>
<input id="username" type="text" placeholder="用户名">
<label>密码</label>
<input id="password" type="password" placeholder="密码">
<div style="text-align:right;">
<button onclick="doLogin()">登录</button>
</div>
</div>
<div id="mainUI">
<h1>IMX6ULL智能家居控制台</h1>
<div id="connectionStatus" class="status">未连接</div>
<button onclick="sendCommand('LED1_ON')">打开LED</button>
<button onclick="sendCommand('LED1_OFF')">关闭LED</button>
<button onclick="sendCommand('GET_TEMP')">获取温度</button>
<button onclick="sendCommand('BEEP_ON')">打开蜂鸣器</button>
<button onclick="sendCommand('BEEP_OFF')">关闭蜂鸣器</button>
<button onclick="logout()" style="float:right;">登出</button>
<div id="sensorData" style="margin-top:12px;"></div>
</div>
<script>
const serverIP = 'xx.xxx.xxx.xxx';
const wsPort = 555;
let websocket = null;
let deviceConnected = false;
function markControlButtons() {
const btns = document.querySelectorAll('#mainUI button');
btns.forEach(b => {
if (b.getAttribute('onclick') && b.getAttribute('onclick').includes('sendCommand')) {
b.dataset.control = '1';
}
});
}
function setDeviceConnected(connected) {
deviceConnected = connected;
const status = document.getElementById('connectionStatus');
if (connected) {
status.innerHTML = "设备已连接";
status.style.backgroundColor = '#90EE90';
} else {
status.innerHTML = "设备未连接";
status.style.backgroundColor = '#FFB6C1';
}
document.querySelectorAll('#mainUI button[data-control="1"]').forEach(b => {
b.disabled = !connected;
});
}
function showMainUI() {
document.getElementById('loginBox').style.display = 'none';
document.getElementById('mainUI').style.display = 'block';
markControlButtons();
setDeviceConnected(false);
connect();
}
function doLogin() {
const user = document.getElementById('username').value;
const pass = document.getElementById('password').value;
if (user === 'xxxxxxx' && pass === 'xxxxxxx') {
sessionStorage.setItem('loggedIn', '1');
showMainUI();
} else {
alert('用户名或密码错误');
}
}
function logout() {
sessionStorage.removeItem('loggedIn');
location.reload();
}
function hexToString(hex) {
hex = hex.replace(/\s+/g, '').replace(/0x/g,'')
if (hex.length === 0) return ''
if (hex.length % 2 !== 0) {
hex = '0' + hex;
}
try {
const bytes = new Uint8Array(hex.length / 2);
for (let i = 0; i < hex.length; i += 2) {
bytes[i / 2] = parseInt(hex.substr(i, 2), 16);
}
const dec = new TextDecoder('utf-8');
return dec.decode(bytes);
} catch (e) {
console.warn('hexToString decode failed', e);
return '';
}
}
function connect() {
websocket = new WebSocket(`ws://${serverIP}:${wsPort}`);
websocket.onopen = function () {
document.getElementById('connectionStatus').innerHTML = "已连接到服务器(等待设备状态)";
document.getElementById('connectionStatus').style.backgroundColor = '#FFFF99';
};
websocket.onmessage = function (event) {
const msg = event.data;
if (typeof msg === 'string') {
if (msg === "DEVICE_CONNECTED") {
setDeviceConnected(true);
return;
}
if (msg === "DEVICE_DISCONNECTED") {
setDeviceConnected(false);
return;
}
if (msg.startsWith("TEMP:")) {
const val = msg.slice(5);
document.getElementById('sensorData').innerHTML = `电压: ${val} V`;
return;
}
if (msg.startsWith("DATA:")) {
const hex = msg.slice(5);
const text = hexToString(hex);
document.getElementById('sensorData').innerHTML = text !== '' ? `收到设备字符串:${text}` : `收到不可读二进制数据(无法解码为文本)`;
return;
}
if (msg.startsWith("ERROR:")) {
alert(msg);
return;
}
document.getElementById('sensorData').innerHTML = `收到: ${msg}`;
} else {
try {
const reader = new FileReader();
reader.onload = function () {
const arrayBuffer = reader.result;
const bytes = new Uint8Array(arrayBuffer);
const dec = new TextDecoder('utf-8');
const s = dec.decode(bytes);
document.getElementById('sensorData').innerHTML = `收到设备字符串(二进制帧):${s}`;
};
reader.readAsArrayBuffer(event.data);
} catch (e) {
document.getElementById('sensorData').innerHTML = `收到二进制消息(len=${event.data.byteLength})`;
}
}
};
websocket.onclose = function () {
document.getElementById('connectionStatus').innerHTML = "连接已断开(与服务器)";
document.getElementById('connectionStatus').style.backgroundColor = '#FFB6C1';
setDeviceConnected(false);
};
websocket.onerror = function (e) {
console.error('WebSocket error', e);
};
}
function sendBinaryArray(arr) {
if (websocket && websocket.readyState === WebSocket.OPEN) {
try {
websocket.send(new Uint8Array(arr));
return true;
} catch (e) {
console.warn("Binary send failed, will try textual fallback", e);
return false;
}
} else {
alert("未连接到服务器!");
return false;
}
}
function sendCommand(cmd) {
if (!deviceConnected) {
alert("设备未连接,无法发送命令");
return;
}
const map = {
"LED1_ON": [0x01, 0x01, 0xFF],
"LED1_OFF": [0x01, 0x02, 0xFF],
"BEEP_ON": [0x02, 0x01, 0xFF],
"BEEP_OFF": [0x02, 0x02, 0xFF],
"GET_TEMP": [0x03, 0x01, 0xFF],
};
const payload = map[cmd];
if (!payload) {
alert("未知命令");
return;
}
const ok = sendBinaryArray(payload);
if (!ok) {
websocket.send(cmd);
}
}
window.onload = function () {
if (sessionStorage.getItem('loggedIn') === '1') {
showMainUI();
} else {
document.getElementById('username').focus();
}
};
</script>
</body>
</html>
|
houduan.py: 点击查看更多
注意修改成自己的tcp端口号
1
2
3
4
5
6
7
8
9
10
11
12
13
14
15
16
17
18
19
20
21
22
23
24
25
26
27
28
29
30
31
32
33
34
35
36
37
38
39
40
41
42
43
44
45
46
47
48
49
50
51
52
53
54
55
56
57
58
59
60
61
62
63
64
65
66
67
68
69
70
71
72
73
74
75
76
77
78
79
80
81
82
83
84
85
86
87
88
89
90
91
92
93
94
95
96
97
98
99
100
101
102
103
104
105
106
107
108
109
110
111
112
113
114
115
116
117
118
119
120
121
122
123
124
125
126
127
128
129
130
131
132
133
134
135
136
137
138
139
140
141
142
143
144
145
146
147
148
149
150
151
152
153
154
155
156
157
158
159
160
161
162
163
164
165
166
167
168
169
170
171
172
173
174
175
176
177
178
179
180
| import asyncio
import websockets
import re
device_writer = None
web_clients = set()
def broadcast_text(msg: str):
for ws in list(web_clients):
asyncio.create_task(_safe_send(ws, msg))
async def _safe_send(ws, msg: str):
try:
await ws.send(msg)
except Exception:
try:
await ws.close()
except Exception:
pass
web_clients.discard(ws)
async def handle_imx6ull(reader: asyncio.StreamReader, writer: asyncio.StreamWriter):
"""
处理 imx6ull 的 TCP 连接。
- 把收到的原始字节尝试按 UTF-8 解码;如果是数字/浮点文本(例如 "0.123"),当作 TEMP 广播;
否则以 hex 广播为 DATA。
- 当设备连接/断开时广播 DEVICE_CONNECTED / DEVICE_DISCONNECTED
"""
global device_writer
peer = writer.get_extra_info('peername')
print(f"[TCP] imx6ull connected from {peer}")
if device_writer is not None and device_writer is not writer:
try:
device_writer.close()
await device_writer.wait_closed()
except Exception:
pass
device_writer = writer
broadcast_text("DEVICE_CONNECTED")
try:
while True:
data = await reader.read(1024)
if not data:
print("[TCP] imx6ull closed connection")
break
decoded = None
try:
decoded = data.decode('utf-8', errors='strict').strip()
except Exception:
decoded = None
if decoded:
if re.fullmatch(r'\d+(\.\d+)?', decoded):
broadcast_text("TEMP:" + decoded)
print(f"[TCP] recv TEMP {decoded} from device")
continue
hexstr = data.hex()
broadcast_text("DATA:" + hexstr)
print(f"[TCP] recv hex {hexstr} from device")
except Exception as e:
print(f"[TCP] device error: {e}")
finally:
if device_writer is writer:
device_writer = None
broadcast_text("DEVICE_DISCONNECTED")
try:
writer.close()
await writer.wait_closed()
except Exception:
pass
print("[TCP] imx6ull cleanup done")
async def handle_web_client(ws, path):
"""
处理网页的 websocket 连接。
- 接收二进制消息或文本命令并转发到 device_writer(TCP)
- 初次连接时通知当前设备状态
"""
global device_writer
print("[WS] web client connected")
web_clients.add(ws)
try:
if device_writer is not None:
await ws.send("DEVICE_CONNECTED")
else:
await ws.send("DEVICE_DISCONNECTED")
except Exception:
pass
try:
async for msg in ws:
if isinstance(msg, bytes):
if device_writer is None:
await _safe_send(ws, "ERROR: device not connected")
continue
transport = getattr(device_writer, "transport", None)
if transport is None or transport.is_closing():
device_writer = None
broadcast_text("DEVICE_DISCONNECTED")
await _safe_send(ws, "ERROR: device disconnected")
continue
try:
device_writer.write(msg)
await device_writer.drain()
except Exception as e:
print(f"[WS->TCP] send error: {e}")
device_writer = None
broadcast_text("DEVICE_DISCONNECTED")
await _safe_send(ws, "ERROR: failed to send to device")
else:
cmd = str(msg)
mapping = {
"LED1_ON": bytes([0x01, 0x01, 0xFF]),
"LED1_OFF": bytes([0x01, 0x02, 0xFF]),
"BEEP_ON": bytes([0x02, 0x01, 0xFF]),
"BEEP_OFF": bytes([0x02, 0x02, 0xFF]),
"GET_TEMP": bytes([0x03, 0x01, 0xFF]),
}
payload = mapping.get(cmd)
if payload:
if device_writer is None:
await _safe_send(ws, "ERROR: device not connected")
continue
try:
device_writer.write(payload)
await device_writer.drain()
except Exception as e:
print(f"[WS->TCP] send error: {e}")
device_writer = None
broadcast_text("DEVICE_DISCONNECTED")
await _safe_send(ws, "ERROR: failed to send to device")
else:
await _safe_send(ws, "ERROR: unknown command")
except websockets.exceptions.ConnectionClosed:
pass
except Exception as e:
print(f"[WS] client error: {e}")
finally:
web_clients.discard(ws)
print("[WS] web client disconnected")
async def main():
tcp_server = await asyncio.start_server(handle_imx6ull, "0.0.0.0", 444)
print("[MAIN] TCP server listening on 0.0.0.0:444")
ws_server = await websockets.serve(handle_web_client, "0.0.0.0", 555)
print("[MAIN] WebSocket server listening on 0.0.0.0:555")
await asyncio.gather(tcp_server.serve_forever(), ws_server.wait_closed())
if __name__ == "__main__":
asyncio.run(main())
|
G 拓展部分-Linux智能车载控制系统
智能家居可以让我们大致体验到基础功能,但是作为一个实际的系统,不可能功能这么少/简略,如果还是在智能家居方面,其实主要添加点在于控制家居,也就是添加继电器或者其它模块,或者是一些物理网的协议能实现对家居的控制,而不是仅仅读取传感器
所以这里引入Linux智能车载控制系统部分,这里的外设还是蜂鸣器/LED,然后同样是温湿度/板载的光照传感器,在调试方面可以选择使用串口输出/蓝牙输出,然后结合QT的多媒体功能和TCP网络的方面外部接口(实现比如天气/时间等的获取),当来实现一个相对高级的车载系统
下面还是先介绍一下需要使用的东西,当然,是在智能家居的环境以及底层驱动的基础上添加/修改布局,对于上层,我们主要添加定时器定时对天气的更新(保留对传感器的定时读取)
G.1 多媒体部分
多媒体包括 音频 和 视频,但是可惜的是我的IMX6ull是 mini版本,所以并没有音频的模块,所以这里也只能实现视频部分,音频部分依旧使用蜂鸣器进行替代,当然,如果想播放音乐,可以选择参考正点原子的QT指南的多媒体模块学习
/待补充…………………………………
G.1.1 准备环境
G 1.2 相关库/函数的介绍
G 1.3 如何添加资源(补充)
G 1.4 代码的具体实现
最后这里还要考虑在视频播放的时候,如何返回主界面,所以要对界面进行一个设计
G.2 界面设计/逻辑部分
G.3 获取天气/网络部分
G.4 整体逻辑链接
G.5 源码
参考文献
- 【正点原子】I.MX6U嵌入式Linux驱动开发指南V1.81
留言
有问题请指出,你可以选择以下方式:
- 在下方评论区留言
- 邮箱留言